Showing posts with label yarn. Show all posts

Thursday, April 7, 2016

F is for Forging ahead

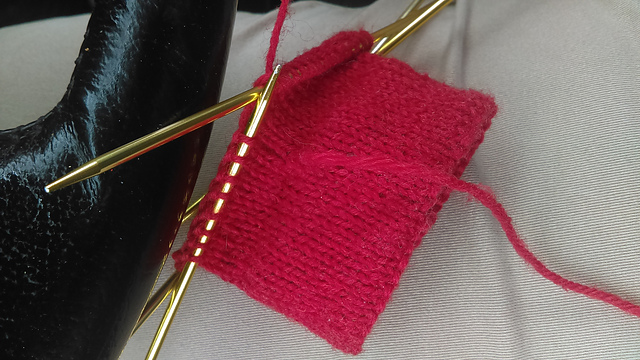
Okay, so our edging is done, the gusset is ahead; in the meantime there's a few inches of plain knitting to fly through.  After I finished joining the cuff, I brought the yarn tail forward, so it would mark the beginning of the rounds.


You could also mark this stitch with a safety pin or a locking stitch marker - anything that will help you keep track of where your rounds start and stop.  Ma might have purled the last stitch of every round, a detail that almost every period stocking and sock would have had, mimicking the seam on old-fashioned sewn stockings, but also having the very practical purpose of marking the beginning of the rounds, where to place decreases for a shaped leg, and keeping track of stitch counts through the heel turn.

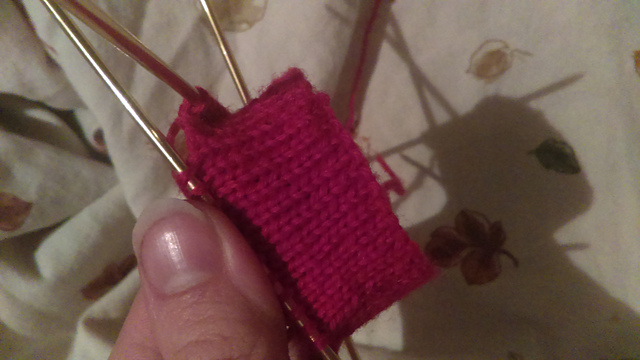
From here to the wrist I can just knit every stitch in every round until the cuff is long enough.  I like my mittens to have a long cuff - I have long arms, and coat sleeves tend to leave several inches of my arm bare to the fierce winds of Midwestern fall and winter.  I put longer cuffs on my kids' mittens too - for toddlers the extra long cuff makes it harder for them to pull them off when I'm not looking, and my boys have a frustrating tendency to start outgrowing their winter jackets right in the middle of the season, when I'm hoping to get a few more weeks of wear so that I can get their new coats when they go on clearance.  A couple extra inches on the mittens lends itself to frugality - keeping rapidly-elongating wrists warm until those 1/2 OFF! signs start appearing.  Four inches should be sufficient. Upon actually attempting this, it turns out that four inches is far too long. A smidge over three inches is plenty long enough, looks more balanced, and doesn't shove shirt sleeves around so much.

This would be a fine section to be knitting by firelight, after the lamps had been turned down and the girls were in bed and couldn't see that Ma was doing Santa's work.

Wednesday, April 6, 2016

E is for Edging

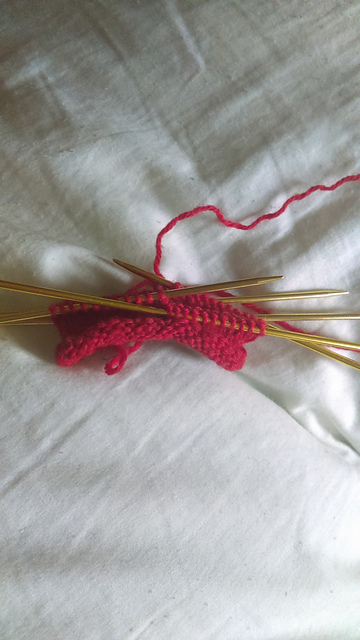
My mitten begins with 44 stitches, cast on using the backwards loop method, over two US size 2 double pointed needles held together. This creates a nice, loose edge that will stretch easily to admit a hand, and will also be easy to pick up stitches from later on. The 44 stitches divide evenly over four needles, and I join in the round and knit every stitch for about an inch.


If I just keep knitting every stitch, the bottom edge of the mitten curls up into a rolled edging that no amount of blocking will keep flat.


To avoid this, I could have alternated the rounds of the first inch with knitting and purling for a garter stitch edge, or I could have opted to do the entire cuff in ribbing, two of the most common ways to keep roll-happy stockinette stitch in check.

The mittens I'm using for reference, however, appear to have a faced, or folded, hem, so that is the edging technique I am using. After that first inch of all knit rows, I purl one round, and then continue knitting.


This creates a line where the fabric naturally wants to fold inward, because of the same stitch tension that causes the knit rounds to fold outward. When I fold the bottom edge up to the inside, that round of purls creates a new, very tidy edging.


I keep knitting until there's about an inch of rounds above the turning ridge.


When folded up to the inside, the cast-on edge lines up with the stitches on the needles. On the next round, as I insert my working needle into each stitch, I also pick up a loop off the cast-on, and work them as one, like a K2tog decrease.

This was hard to get a picture of, but you can see the needle in the first loop, next to it the second loop, and my thumbnail is pointing to the third loop, so you have an idea where loops on the cast-on edge are

After I've done this all the way around, joining each live stitch with a loop from the cast-on, the edge is completely secured, and I have a lovely folded hem.


If joining the hem as you go is too much stitch juggling for you, it may be simpler to whip-stitch the edge to the inside after you've finished knitting the mitten, but personally I never sew when knitting can get the job done just as neatly.  You could also leave the hem completely unattached, and pick up the lining directly from the cast-on edge, which I probably would have done if I wasn't so enamored of the join-as-you-go method.  As it is, the join leaves a little ridge on the inside that will work just as well as a place to pick up the stitches later on.

PS, if instead of a purl row, you (YO, K2tog) across the turning row, the end result will be a picot hem, which is an adorable, feminine edging option.


Tuesday, April 5, 2016

D is for Decoding the Design

I'm modeling the mitten that I'm going to make (wait, is it M day already?) on a picture that I pilfered from Pinterest (or P day?).

The link from the pin is broken, but the caption says that it's a boy's mitten from ca. 1858-1863, which is about fifteen years too early, but since mitten design hasn't changed much in the last 70 years (compare this pattern from 1940 to this pattern from 2007, I think we can safely say what they were knitting in 1858 probably isn't too far off from what Ma was knitting in 1874.  

So what can we deduce from this historical sample?

Starting at the bottom: there's no obvious edging - no garter trim or ribbing to keep the bottom edge from curling, and while the caption says that it has an orange knit lining, it's not visible in the part of the picture that shows the inner edge of one mitten, but it is definitely stockinette on the inside, too, so the edge is probably faced - folded up  to the inside, and sewn down, or - more likely - joined to the live stitches as the knitter worked up the hand.  You can just about see the line where the double thickness of the folded up edge ends, about an inch from the bottom.  The mitten on the right side of the picture looks like it might have some decreases in the cuff, adding to the flared effect, but not enough for me to bother trying to duplicate it.

The increases for the thumb gusset are unusually placed.  Instead of new stitches always being placed on the outside of the previous increases - growing into the thumb, the new stitches are placed inside the previous increases - growing out into the hand.  It makes it less intuitive which stitches to divide for the thumb.  The number of stitches between the increases is hard to measure, possibly four or five?

Decreases are done like a flat sock toe rather than spiraling.  Probably a three-needle bind-off on the right-side mitten, the one in the left side of the picture looks as though it might have a drawn-through bind off.  

The gauge looks like it might be 8-10 stitches to the inch, but the resolution makes it difficult to count.  

If anyone knows anything about the original source or how to find out more about these mittens, please let me know in the comments!

Monday, April 4, 2016

C is for Calculations

Any time you knit something, you should first make a gauge swatch - a small square of knitting from the yarn and needles you think you'll be using.  It gives you a chance to see if the resulting fabric has the qualities you want in your finished piece, and, if you're working from a pattern, to make sure that you're matching the numbers the designer used.  If you're not getting the same number of stitches and rows per inch, your finished object will not be right size.

I hate making swatches.  I want to knit a mitten, not an aimless tube.  However, without an existing pattern, I don't know how many stitches to cast on for a mitten, so a gauge swatch I must make.

I cast on some 30 odd stitches, and since I was going to be working in the round, I made my swatch in the round.  I knit for a good three inches, cast off, and whipped out the measuring tape.


Here's how it breaks down:

My stitch gauge, measured over several spots on the swatch, averaged at 8.5 stitches per inch.

The row gauge averaged at 10.5 rounds per inch.

I'm knitting these mittens for my four year old.  His measurements are:

Wrist circumference: 4.75"
Hand circumference at base of thumb (the widest point of the mitten): 6.25"
Hand circumference above base of thumb: 5.25"
Wrist to tip of pinky finger (traditional spot for decreases to begin): 3.1"
Wrist to tip of middle finger: 4.1"
Thumb length: 1.75"

If I multiply each circumference measurement by 8.5, I'll have the minimum number of stitches I'll need to fit around each part of the hand.  I like to have a little wiggle room in mittens (and I'll need a little space for the lining, too), so I will add 1/2" to each circumference before doing the multiplication.  I also like to work with a set of five needles, so I'm going to round the numbers down or up whenever possible to have a multiple of 4 stitches to evenly divide across the needles.

End result:

Stitches to go around the wrist: 44
Stitches to around widest part of hand: 56
Stitches to go around the hand after dividing for the thumb: 48

The math for the length will only matter for the increases to the thumb and the decreases to the top of the hand - otherwise the number of rows doesn't need to be notated - you just knit to the desired length.  I'll deal with those numbers when I reach those sections.

We're almost ready to cast on!

Saturday, April 2, 2016

B is for Before we Begin: the Basics

According to her autobiography, Laura Ingalls Wilder learned to knit when she was four years old, by watching her mother teach Mary, who was then six.


Learning to knit is easier than learning to read (two stitches versus twenty-six letters and thousands of words), and only slightly more difficult than learning to tie your shoes.  It takes only the patience, attention-span, and dexterity of an average six-year-old, or that of an especially observant and tenacious four-year-old.  It requires minimal equipment, it's extremely portable, and it can be done in the dark or by the blind, and it's very easy to fix mistakes.  Frustrating, but simple.


Victorian-era knitters tended to use finer yarns and smaller needles than we use today - there is no evidence that I've found of worsted-weight yarn being used for mittens, or really anything other than rugs, blankets, or heavy shawls.  There are patterns still available for mittens knit on the equivalent of US 00000 needles, using silk thread around the same thickness as sewing thread.  These are fancy mittens, of course, though they're probably warmer than you would expect - silk is an excellent insulator. For everyday mittens, meant to be worn by children for one or two seasons and then likely unraveled and reknit into larger mittens or something else, a plain wool yarn would be much more practical.  The yarn still wouldn't be any heavier than DK at most, though.  I've chosen to use a light sportweight yarn - Knit Picks Wool of the Andes Sport.  It's inexpensive, 100% wool, not too soft (scratchier yarns tend to be sturdier), but not too coarse, and I will be able to use the leftovers for other projects that I'm planning for the blog.  I haven't decided what I'll use for the knit lining, but it will be a fingering weight yarn.

The basic skills required for knitting basic mittens:

Casting on
Knitting
Purling
Working in the round
Increasing
Decreasing
Finishing off
Picking up stitches
Weaving in ends
Knitting a second mitten after you're already sick of the first

Tally-ho

Friday, May 1, 2015

Backtracking a bit

Laura had only a corncob wrapped in a hankerchief, but it was a good doll.  It was named Susan.  It wasn't Susan's fault that she was only a corncob.  -Little House in the Big Woods, Chapter 1

I wasn't going to do this one, because it's in "My Little House Craft Book," and it's so darn straightforward, but I find that my next few projects are stalled out waiting for yarn/fabric, and I want to post something in the meantime . . .

When I was younger, I found so much pathos in the idea of a little girl who is so poor that she only has a corncob to play with.  As I got older, I found it slightly comical - it has that air of a grandparent telling children, "When I was your age, we didn't have all these fancy toys!  We played with dirt, and we liked it!"


Now that I have a toddler, I can understand why a parent might hold off on giving a small child a toy with potentially small parts like button eyes or bits of yarn hair that can be yanked off and choked upon, and why 'upgrading' might be delayed when you have three small children and a house to take care of with absolutely no modern conveniences.

The retired blog Our Pioneer Homestead had an example of how the hankerchief idea can make quite a perfectly respectable, if limbless, doll.  The picture can still be seen on Pinterest, but the tutorial is gone.  Little House Living has one, just tie the hankerchief higher and fluff the 'skirt' out more to get the Pioneer Homestead look.

You can push the corncob idea even further and build a doll with legs and arms, or you can chuck the cob altogether and make a doll from the husks instead, or indeed, make a doll from just the hankerchief.

According to the tutorial, hankerchief dolls have a long history as an economical, quiet toy for children to play with, often made from the hanky of a loved one who had been lost or was far away.  My hankerchief came from a rummage sale, so the sentimental value is lost, but while it won't keep my exuberant three year old quiet for longer than a few seconds, it certainly has the virtue of falling silently to the floor.


Unlike Ma Ingalls I don't really have a lot of hankerchiefs or corncobs at my disposal - but I do have lots of cheap yarn (lots and lots and lots).  There are a few different ways to make a simple yarn doll, but this is how I learned, probably from the same doll book that I traced my paper dolls from.  Should you find yourself with one or more small children trapped in your house on a rainy or cold day, it's an easy, quick, kid-friendly craft so you can all play dolls like Mary and Laura.

 You'll need:

-Yarn (any weight or fiber will do, I'm using worsted-weight acrylic)
-A book or a piece of cardboard a little taller than you want your doll to be
-Scissors


Working lengthwise, wrap the yarn about 70-100 times around the book, then cut the end (all numbers are approximate; wrap more times for thinner yarn or if you want a plumper doll, fewer for thicker yarn or a thinner doll).


Cut about a 8" length of yarn from the ball.  Tie it very tightly around the wraps to hold them together (it is not necessary to trim the ends of the tie), and then slide the bundle of yarn off of the book


Cut another piece of yarn at least 10" long.  Holding the bundle about two inches below where you tied it, so that the tie is at the top and the knot is inside the bunch, wrap another piece of yarn around the whole bundle.  This will be the neck.  Wrap it around at least twice and knot it tightly. Set aside.


Working widthwise this time, wrap the yarn around the book about 50-75 times and cut the end.  Carefully slide the bundle off of the book.  This will be the arms.


Cut two 6" lengths of yarn.  Tie one around each side of the shorter yarn bundle about an inch in from the ends to make hands.


Place the arms inside the loop of the larger bundle just below the neck.  Tie another 10" length of yarn around the body below the arms to hold them in place and make the waist.


Cut open the bottom of the bundle.


Trim the ends and fluff out for a skirt . . .


. . .Or divide it in half, left and right, and tie with short pieces of yarn to make legs.  You can trim the ends of the hands or leave them as loops.


Sweep up all your little yarn ends, and play!