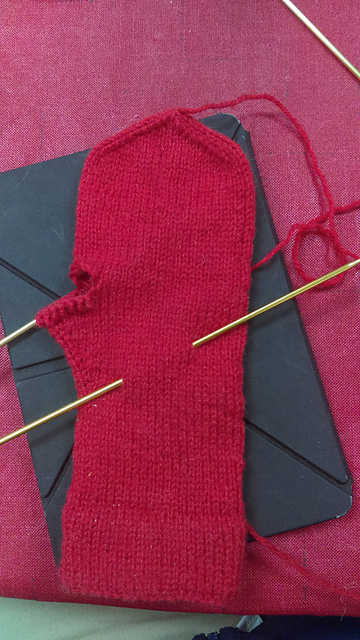
Look! It's almost a mitten!
Let's get down to business to create the thumb.
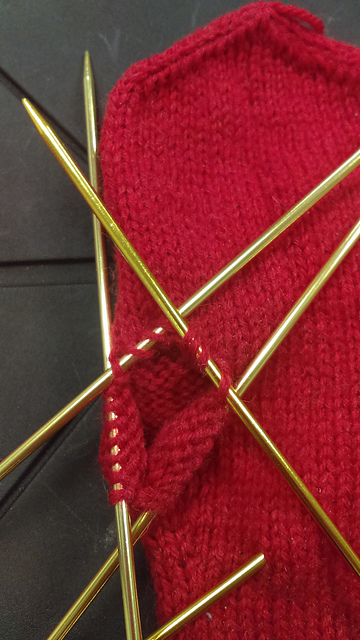
My first step is to transfer the stitches on the waste yarn back onto needles. In doing so, I discovered that I had 15 thumb stitches, instead of 16. This solves the mystery of why I had an extra stitch when I finished decreasing for the top of the mitten. Apparently I literally can't count. Thanks a lot, first grade.
Now I need to pick up the stitches around the open space. Typically one picks up a stitch in each of the cast-on stitches (6), and one in the gap between the live stitches and the picked-up stitches (so 8 altogether, in this case). Because I'm short a stitch anyway, I've picked up an extra stitch where the gap is particularly wide, which should help prevent the holes that are likely to occur around thumb bases. Normally I would pick up these new stitches with the working yarn as I went, but I decided to try picking up the loops from the existing fabric first, just to see how it goes.
I don't like it any better than I ever like picking up stitches (which is not at all, ever), but it works well enough.
I join my working yarn at the first picked-up stitch and work around to the last live stitch, which I work together as a k2tog with the first new stitch, to further help closing the gaps from picking up stitches. I do the same with the last picked-up stitch and the first live stitch as I continue, and keep decreasing on either side until I have 16 stitches left. This whole section is a leap of faith for me - I'm not really sure how the thumb is going to end up fitting, especially with the lining inside. Trial and error, like everything else I've done so far . . .
The rest of the thumb is knit plain until it reaches the top of my son's thumb, then I will k2tog around until there are 4 stitches left, cut the yarn (leaving an eight inch tail) and draw through the stitches twice to secure.


Beautiful! I often mess up when I'm counting stitches--even when I count twice--or more.
ReplyDelete